

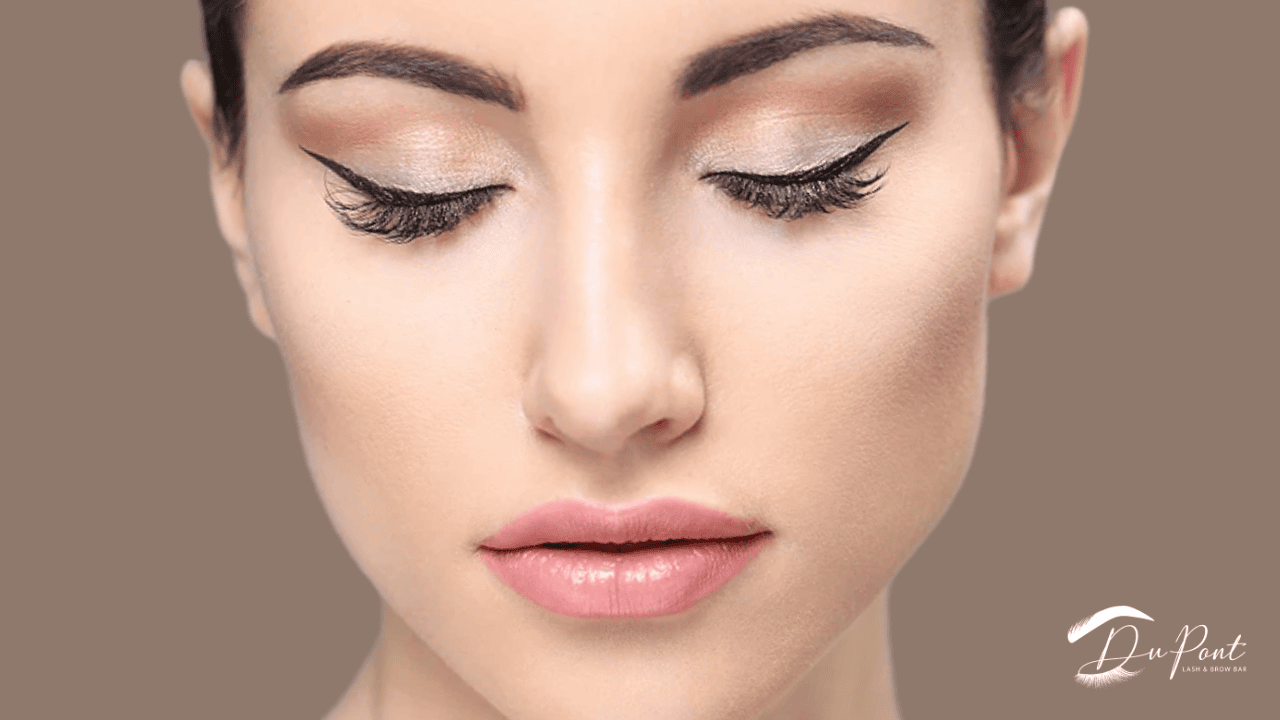
Mastering the Art of Winged Eyeliner: Tips and Techniques
Winged eyeliner, often referred to as the “cat-eye,” is a classic makeup technique that adds drama, sophistication, and allure to your eyes. While achieving the perfect wing may seem daunting, with the right tips and techniques, you can master this timeless look.
In this blog, we’ll explore the art of winged eyeliner, providing step-by-step guidance to help you achieve a flawless wing every time.
Step 1: Choose Your Eyeliner
Before you begin, select the type of eyeliner you’re most comfortable with. You can use a liquid liner, gel liner, or pencil liner, depending on your preference. Liquid liners offer precision, gel liners offer flexibility and pencil liners are beginner-friendly.
Step 2: Prepare Your Eyelids
Start by priming your eyelids with an eyeshadow primer or concealer. This creates a smooth canvas for the eyeliner and helps it stay in place.
Step 3: Draw the Base Line
Begin by drawing a thin line along your upper lash line, starting from the inner corner and extending toward the outer corner. Keep the line as close to the lashes as possible.
Step 4: Create the Wing
The wing is the defining feature of this look. To create it, follow these steps:
- Imagine a line extending from the outer corner of your eye towards your eyebrow, forming an angle that suits your preference. This angle will determine the wing’s shape and length.
- On this imaginary line, make a small mark where you want the wing to end.
- Now, connect the mark to the outer corner of your eye by drawing a straight line. This line should create a diagonal shape.
Step 5: Fill in the Wing
Once you’ve drawn the wing’s outline, fill it in to create a solid line. You can choose to make the wing thin and subtle or bold and dramatic, depending on your style.
Step 6: Connect the Wing to the Base Line
Next, draw a smooth, continuous line from the outer corner of your eye, connecting it to the baseline you created in step 3. This connection should result in a seamless line along your upper lash line.
Step 7: Clean and Refine
Use a pointed cotton swab or a makeup remover pen to clean up any uneven edges or smudges. This step ensures your winged eyeliner looks polished and precise.
Step 8: Curl Your Lashes and Apply Mascara
To complete the look, curl your lashes with an eyelash curler and apply mascara. This will enhance the appearance of your eyes and make the winged eyeliner pop.
Tips for Perfect Winged Eyeliner
Practice — Winged eyeliner can be challenging, so don’t get discouraged if it’s not perfect on your first attempt. Practice makes perfect.
Steady Hand — Rest your elbow on a stable surface and take your time to ensure a steady hand when applying the liner.
Adjust the Angle — Experiment with different angles and wing lengths to find what suits your eye shape and style.
Use Tape or Stencils —If you’re struggling to create even wings, you can use tape or stencils as guides for a cleaner look.
Wrapping Up
Winged eyeliner is a versatile and elegant makeup technique that can transform your entire look.
With practice and the right techniques, you can confidently achieve stunning winged eyeliner that accentuates your eyes and adds a touch of glamour to any occasion.
So, grab your favorite eyeliner and mirror, and embark on the journey to mastering this timeless art.